Before you start
You need Swipeer with a Pro or Business license, an OpenRouter account, and a payment method for your OpenRouter balance. OpenRouter usage is billed separately from your Swipeer plan.
1
Part one
Set up OpenRouter
Create your account, add a small balance, and generate a dedicated API key for Swipeer.
02 / 17
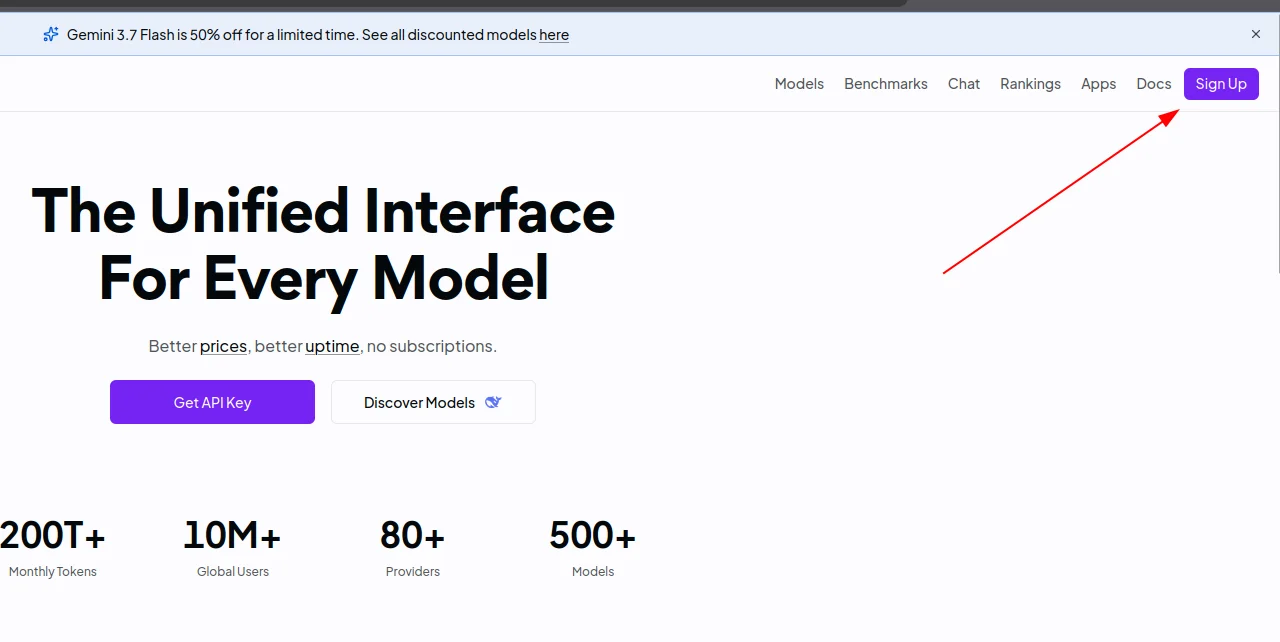
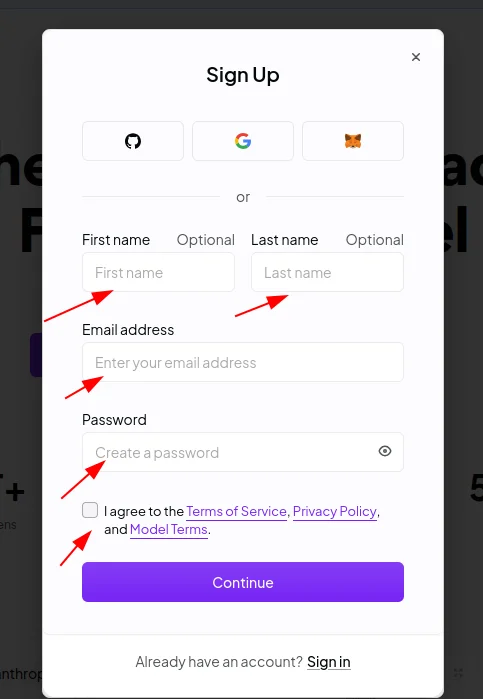
Create your account
Sign up with an existing account or enter your name, email address, and a strong password. Accept the terms, then select Continue.
03 / 17
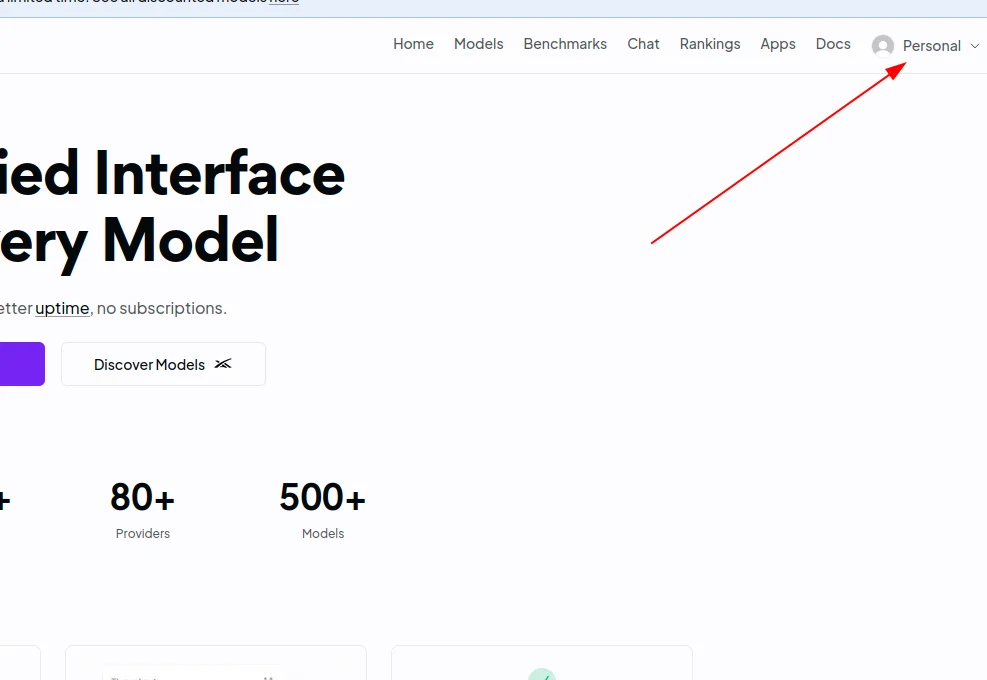
Open your account menu
Once you are signed in, select your profile in the top-right corner to open the account menu.
04 / 17
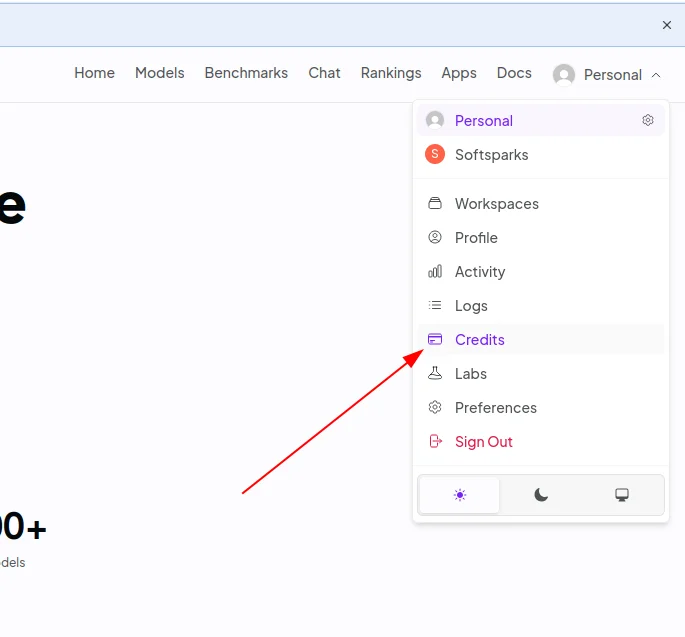
Go to Credits
Select Credits from the account menu. Your balance pays for the models you use through OpenRouter.
05 / 17
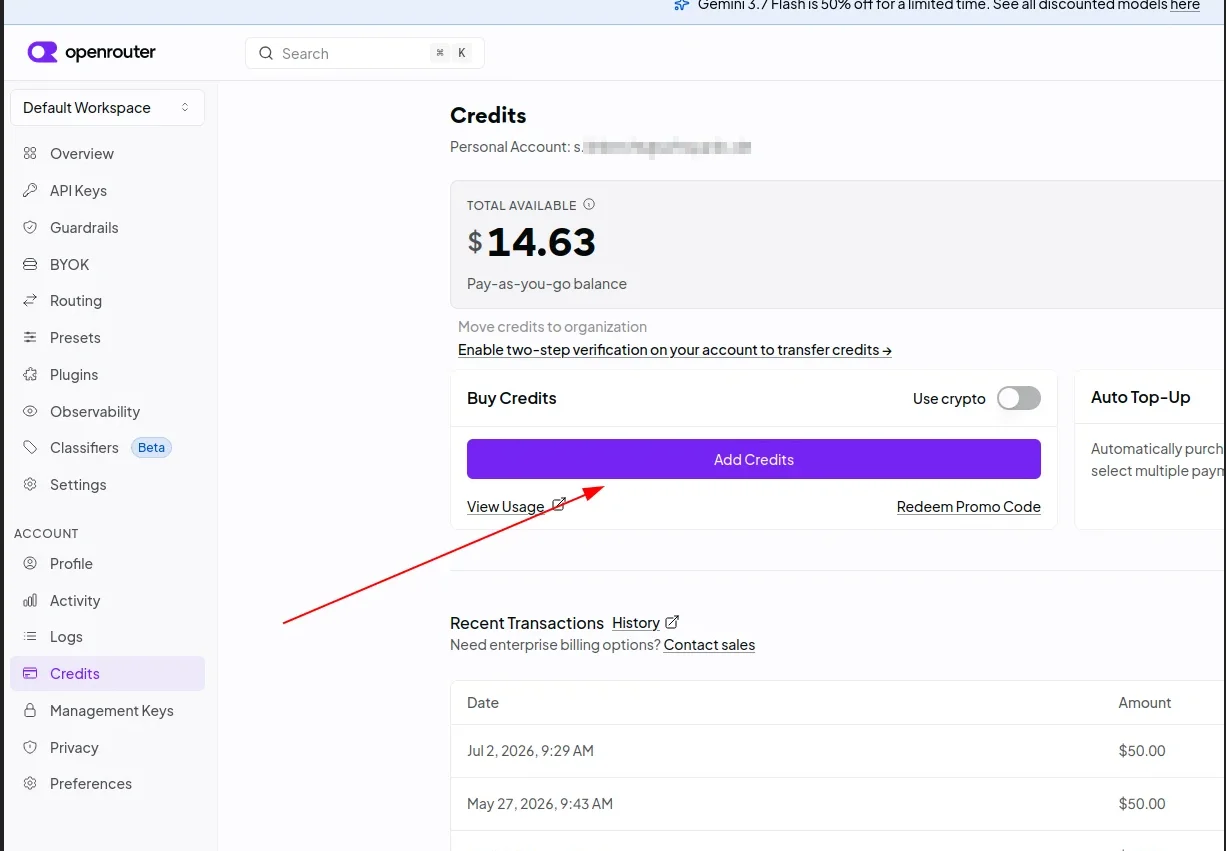
Add credits
On the Credits page, select Add Credits. You can start with a small amount and add more later.
06 / 17
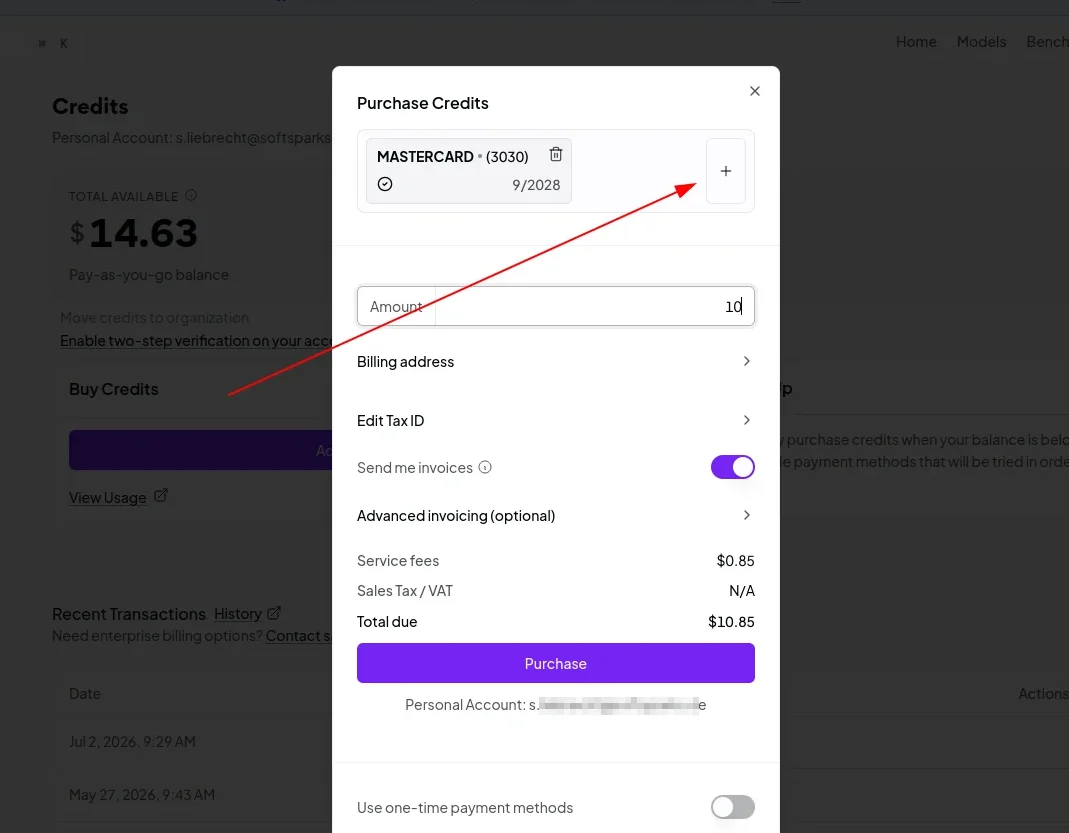
Choose an amount
Select a payment method and enter the amount you want to add. Review the billing details shown before continuing.
07 / 17
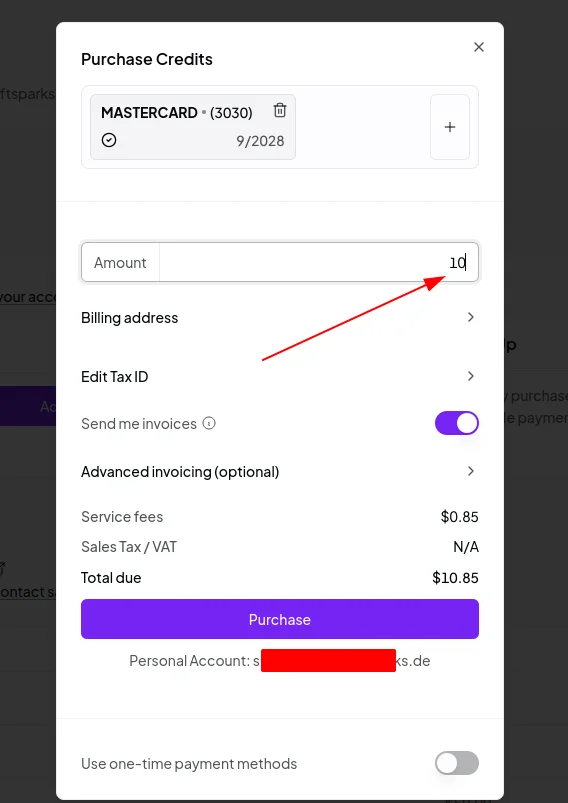
Complete the purchase
Confirm the total and select Purchase. Wait until OpenRouter confirms that the credits were added to your account.
08 / 17
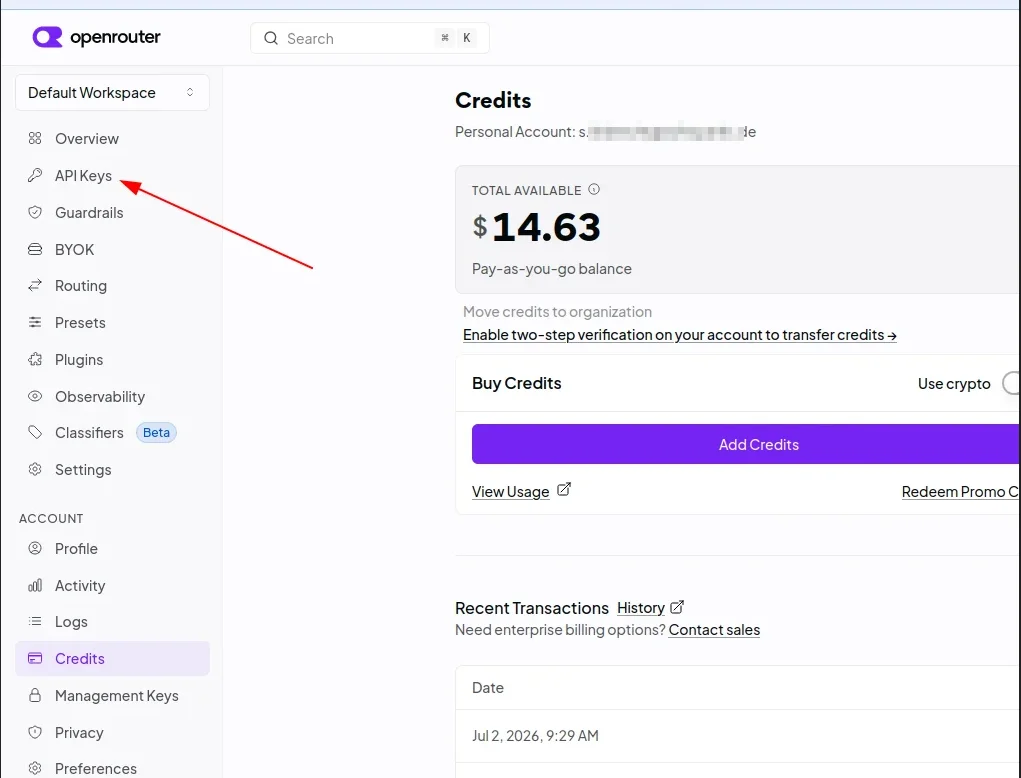
Open API Keys
In the OpenRouter sidebar, select API Keys. This is where you create and manage access keys for apps such as Swipeer.
09 / 17
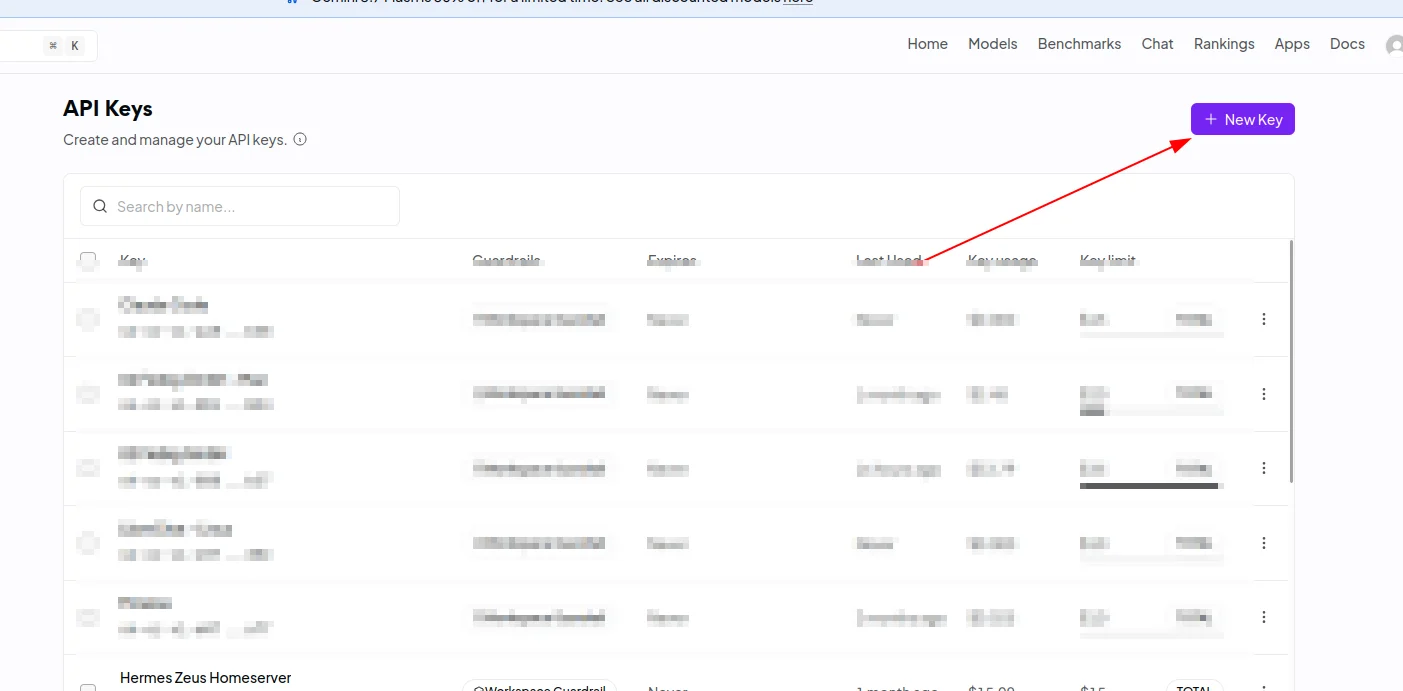
Create a new key
Select New Key in the top-right corner of the API Keys page.
10 / 17
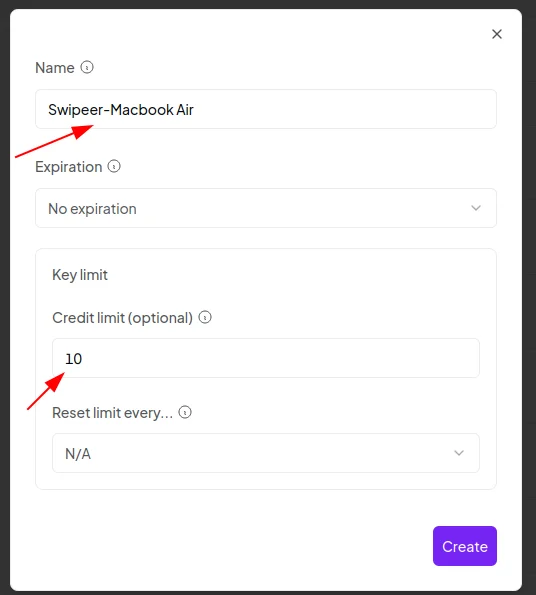
Name and limit the key
Give the key a recognizable name such as Swipeer. An expiration date and credit limit are optional, but a sensible credit limit gives you additional cost control.
11 / 17
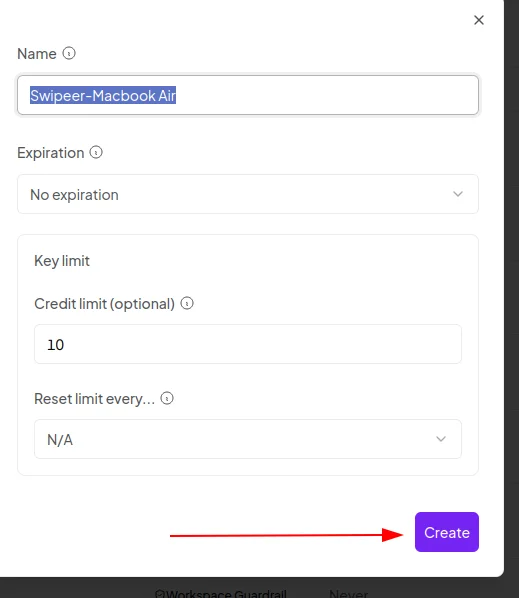
Generate the key
Check your settings, then select Create.
12 / 17
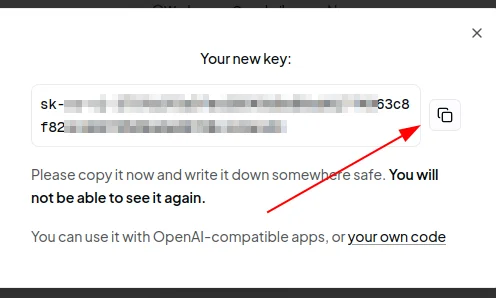
Copy the API key
Select the copy icon and keep the key in your clipboard for the next part. Do not close this dialog until you have copied it—the complete key cannot be displayed again.
If you lose the key, delete it in OpenRouter and create a new one. Do not reuse or share a
key that may have been exposed.
2
Part two
Connect Swipeer
Activate OpenRouter as your provider, paste the key, and save your settings.
Choose one cloud billing method
The Swipeer Credit System and BYOK (OpenRouter) cannot be active at the same time. When BYOK is enabled, supported cloud-model requests are charged to your OpenRouter balance instead of your Swipeer credits.
13 / 17
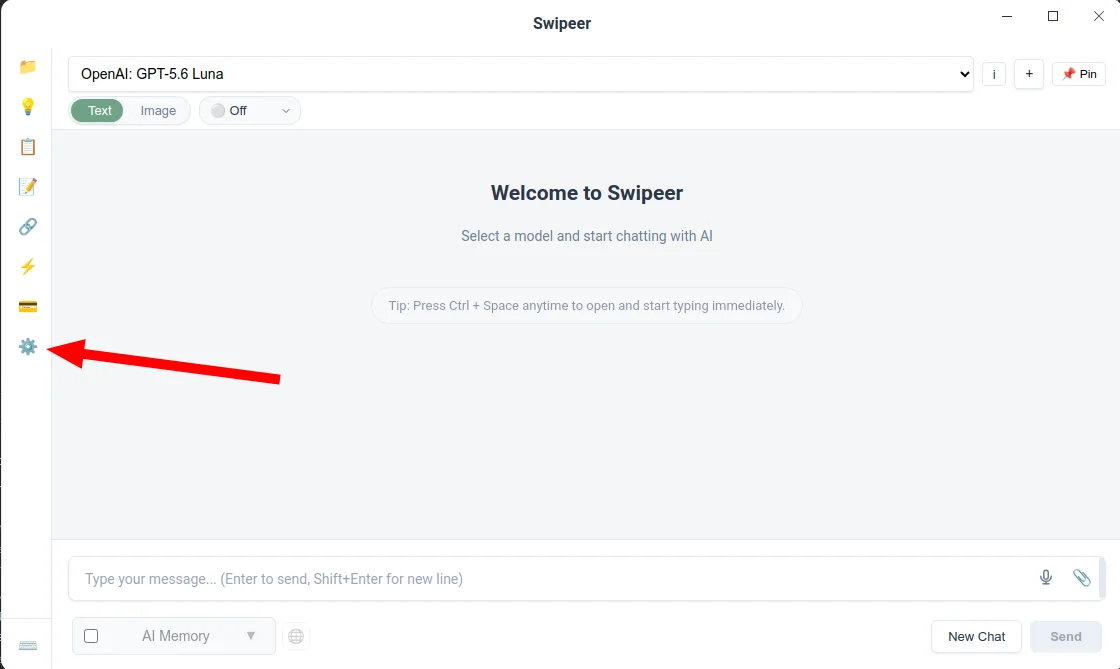
Open Swipeer settings
Open Swipeer and select the gear icon near the bottom of the left sidebar.
14 / 17
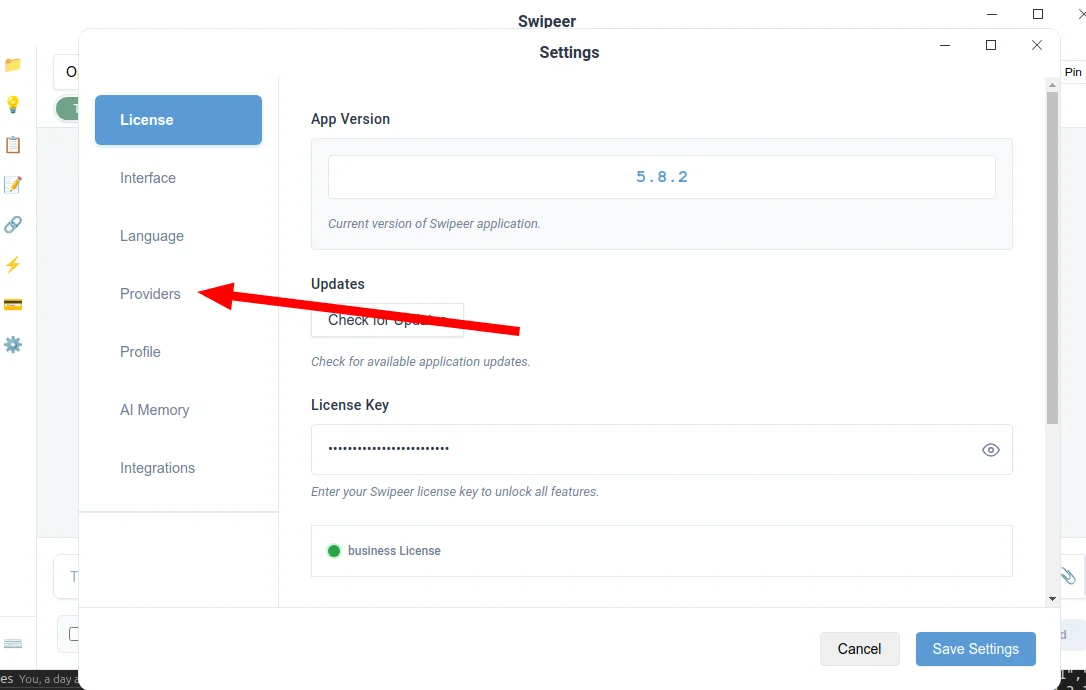
Select Providers
In Settings, select Providers from the left menu.
15 / 17
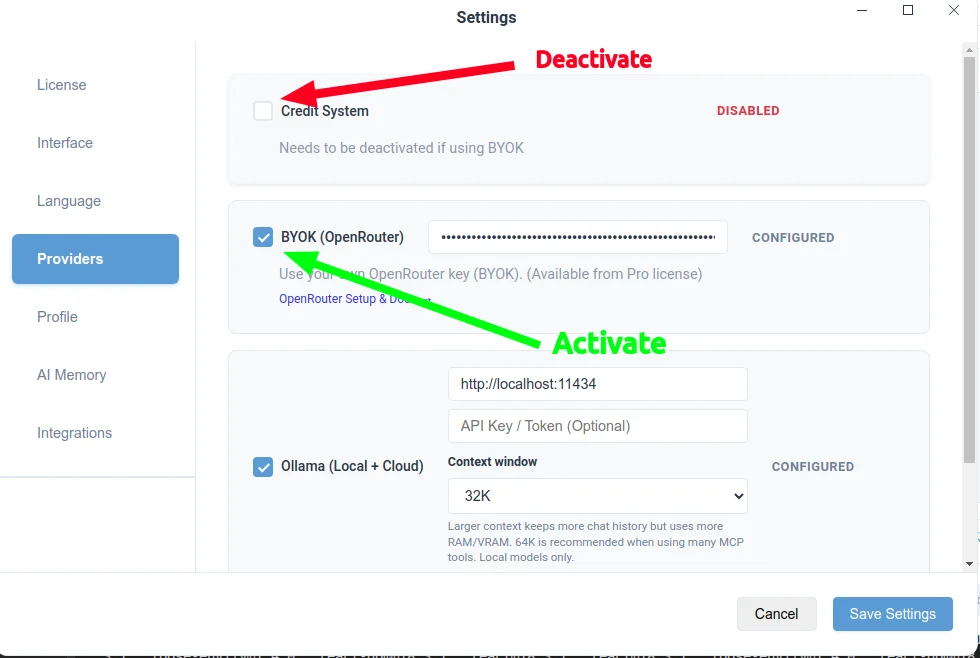
Activate BYOK
Deactivate Credit System, then activate BYOK (OpenRouter). The two options are mutually exclusive.
Your Ollama configuration is independent and does not need to be removed.
16 / 17
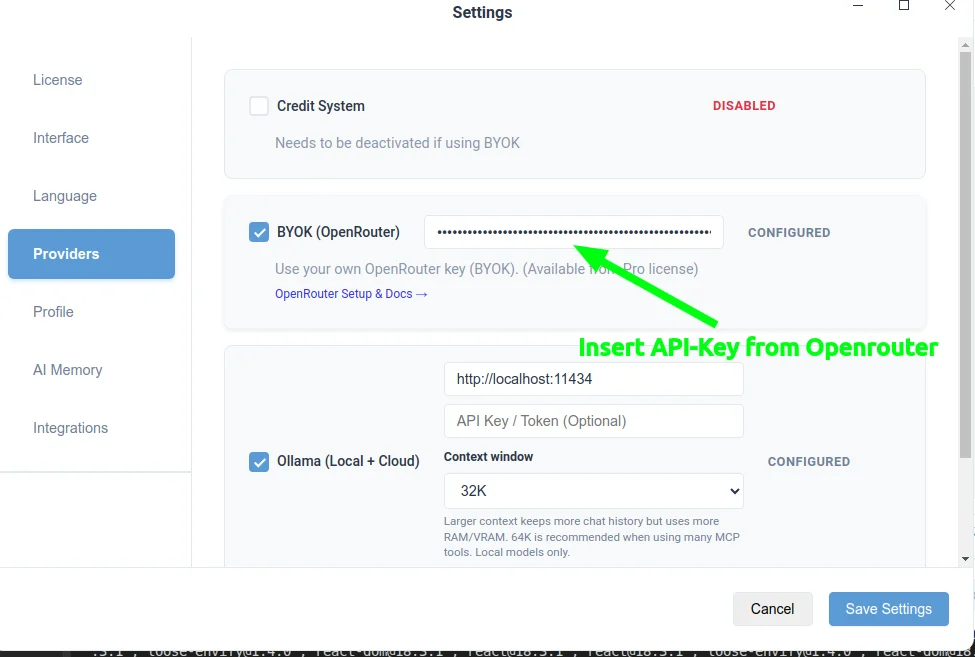
Paste your key
Paste the API key you copied from OpenRouter into the password field next to BYOK (OpenRouter). Make sure there are no spaces before or after the key.
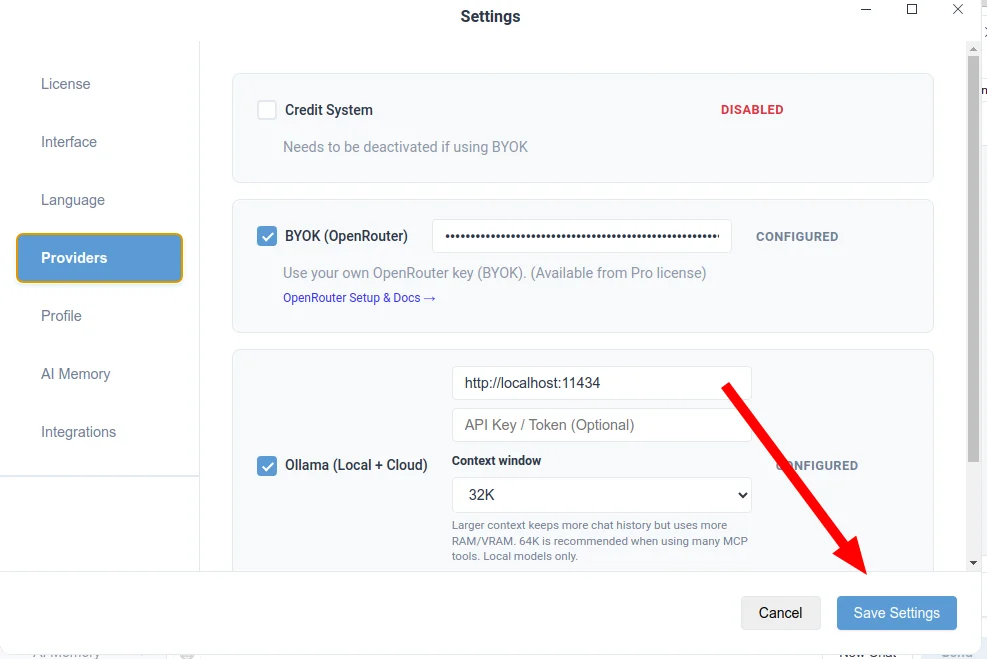
17 / 17
Save your settings
Select Save Settings. OpenRouter is now connected and can be used with the supported models in Swipeer.
You are ready to go
Return to Swipeer's main window, choose an OpenRouter-supported model, and start a new chat. Usage will appear in your OpenRouter account.